

Creating a practical, beautiful kitchen starts with a clear shopping plan. If you approach kitchen interior design as a sequence of decisions: layout, storage, surfaces, lighting, and appliances, you will avoid impulse buys and mismatched finishes. For readers comparing options, this guide shows how to buy with confidence. Because search terms matter to many homeowners, we will use kitchen interior design advice at every step, pairing design reasoning with price-aware recommendations.
Define Your Kitchen’s Mission Before You Buy
Begin with function, not finishes. List what you cook most, how often you entertain, and who uses the space at the same time. This turns planning into a needs-led brief rather than a mood board hunt. If meal prep overlaps with homework or remote work, plan a clear zone for each activity so tasks do not compete. Treat kitchen interior design as a workflow map first and a colour exercise second; your shopping list will immediately look more focused. Write a one-page summary that states the mission, the must-haves, and the nice-to-haves. Carry this note when you shop, and compare every purchase against it. The habit sounds basic, yet it protects your budget and reduces decision fatigue.
Measure Once, Cross-Check Twice
Accurate dimensions protect every other choice. Measure wall lengths, ceiling height, window placement, door swing, and all service points. Good planning relies on clearances: leave room for appliance doors to open, traffic to pass, and drawers to extend fully. When in doubt, draw a simple scale plan on graph paper and move paper cut-outs before you buy any large item. A tolerance of five to 10 millimetres on cabinetry runs can be the difference between a clean fit and costly rework. Confirm dimensions again after hacking or replastering, because walls rarely return to the exact same lines. Note extraction routes, radiator positions, and bulkheads so surprises do not appear on delivery day.
Choose a Layout That Serves Your Routine
Most spaces suit a single-wall, L-shape, or galley plan; island layouts work only if walkways remain generous. Kitchen interior design succeeds when the sink, hob, and fridge form a simple triangle, with prep space between them. Avoid crowding corners with tall units that block light and movement. If you are working in an open-plan home, aim for a peninsula rather than a freestanding island; the extra anchoring gives you storage and power without tightening circulation. Mark walkway widths on the floor with tape to test comfort before you commit.
Pick Cabinet Carcasses With the Right Core
You will see doors, but you will live with carcasses. Moisture-resistant plywood or high-grade particleboard, with proper edge sealing, both perform well when installed correctly. Value improves when you choose standard cabinet widths, because this keeps hardware simple and spares you custom fees. Avoid mixing hinge brands across the same run. Consistent hardware alignment makes doors close cleanly and shelves sit level.
Select Door Fronts for Wear, Not Just Looks
Laminate, thermofoil, painted timber, or PET film each tells a different maintenance story. Matte laminates resist fingerprints and are forgiving in rental or family settings. A satin or super-matte finish will calm reflections and hide minor scuffs. When you compare options, bring a wet cloth to the showroom and test a sample. If marks lift easily, you have a finish that will last under real conditions. Request edge samples too, since edges see the most wear.
Make Worktops Earn Their Keep
Counters absorb daily impact. Engineered stone is durable and consistent; compact laminate offers value with heat caution; stainless steel excels near hobs; sealed timber adds warmth if you wipe spills promptly. Kitchen interior design improves when counter thickness and profile match cabinet style, so the whole run reads as one line. Avoid deeply textured surfaces beside sinks, since crumbs and water sit in the grain and slow cleaning. Check colour under your actual lighting to avoid surprises at installation.
READ MORE: What to Buy for Your HDB 5-Room Kitchen: Design Essentials That Combine Form and Function
Plan Storage by Frequency and Weight
Store heavy items low and frequent items between shoulder and hip height. Deep drawers near the hob hold pots and pans; pull-outs keep spices orderly and visible. Corner solutions should be simple: a straight shelf sometimes beats an over-complicated carousel that steals space. Full-height larders make sense only when aisles remain wide. Otherwise, split storage across shorter runs and a nearby tall unit so movement stays easy. For kitchen interior design in compact homes, a shallow broom cupboard near the entry keeps cleaning gear out of sight.
Buy Appliances You Can Service Locally
Attractive specs are meaningless if repairs take weeks. Choose brands with strong service networks and a stock of common parts. Kitchen interior design should anticipate ventilation needs: ovens and hobs require proper clearances, and fridges need breathing space to run efficiently. Check door swing against adjacent walls and counters, especially on French-door fridges and washer-dryer combos. Test noise levels in person where possible.
Ventilation, Extraction, and Fresh Air
Cooking without extraction leads to residue on cabinets and stale odours. A ducted hood moves air outdoors and works best; a recirculating hood needs frequent filter changes to remain effective. Quiet models are used more often; loud units are left off, which defeats the point. In compact flats, add a ceiling fan in the dining area to move air gently without overpowering conversation. Openable windows and cross ventilation improve comfort, reduce humidity, and protect finishes over time.
Lighting Layers for Work and Mood
Replace the single ceiling light with a plan that mixes ambient, task, and accent layers. Track lighting adapts as layouts change; under-cabinet strips deliver shadow-free prep. Kitchen interior design feels richer when you dim pendants above the table for evening meals and brighten task zones for morning prep. Keep colour temperatures consistent across fixtures to avoid a patchwork of warm and cool pools. Fit dimmers where possible for flexibility.
Tapware, Sinks, and the Daily Touchpoints
Single-lever mixers allow quick temperature control with wet or soapy hands. Pull-out sprays make rinsing pans easy and help you keep the sink area clean. Decisions pay off most at the sink because the location sees the most traffic. Choose a sink that matches your cookware. If pots are large, a deep single bowl beats a divided basin that cramps movement. For interior design for the kitchen with limited space, select a drainer that tucks away.
Backsplashes: Practical Protection That Frames the Room
Glossy tiles clean easily but show grout; large-format slabs reduce joints and visual noise. Stainless panels behind the hob are durable and neutral. Kitchen interior design benefits from continuing the counter material up the wall, which simplifies cleaning and ties the palette together. Extend the splash zone at least 60 centimetres behind the sink to catch stray water. Consider a ledge backsplash to hold salt, oil, or a small herb pot.
Flooring: Comfort Underfoot and Fast Cleaning
Vinyl planks offer warmth and soft footfall; porcelain tiles resist heat and water; sealed timber adds character with more maintenance. Design improves when thresholds are flush and finishes run consistently into adjacent rooms for visual width. Choose mid-tone surfaces that disguise crumbs between cleans. In interior design for the kitchen, slip resistance matters more than trendy colour.
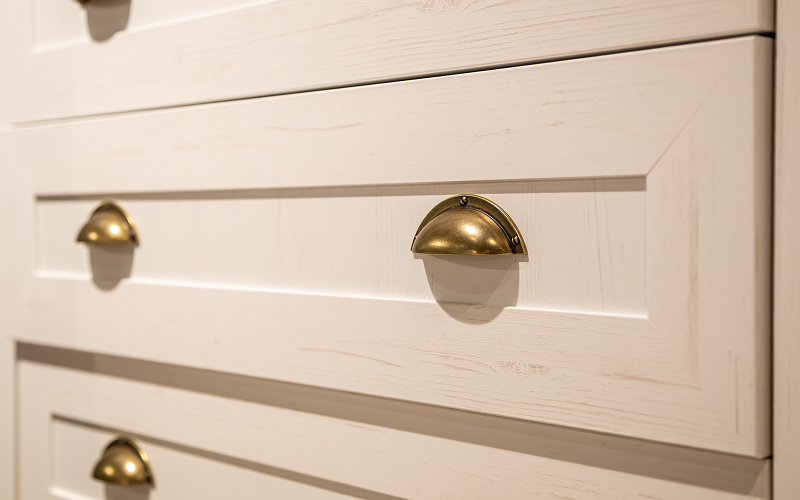
Handles, Hinges, and the Hardware Details
Good hardware makes budget joinery feel expensive. Soft-close hinges and sturdy drawer runners pay you back every day. Kitchen interior design reads cleaner when handle styles match across rooms that share sightlines. Test handles in-store to check grip comfort and how easily they snag clothing. Use a template to align pulls consistently across the room.
Open Shelving: Style With Discipline
Open shelves add air and display space, yet they collect dust if overused. Limit them to one or two short runs and keep items practical: everyday bowls, glasses, and a pot or two. Kitchen interior design remains calm when shelf styling repeats colours from the rest of the home. Mount shelves away from the hob to avoid grease build-up. Keep fixings rated for the intended weight.
Dining Nooks and Multi-Use Counters
Peninsulas and bar counters solve seating in tight spaces. Choose stools that tuck under so circulation stays clear. Informal meals reduce pressure on small dining rooms and keep social energy near the cook. Ensure the knee space and power points work for laptop sessions or homework. For interior design for the kitchen in studios, a folding table adds options.
Colour Strategy: Fewer Moves, Bigger Impact
Use a restrained palette: one neutral, one timber tone, and one accent. This discipline simplifies shopping and allows you to buy slightly larger quantities for better pricing. Kitchen interior design benefits from repetition; repeated materials look intentional and save money on offcuts. Bring home samples and view them under your actual lighting before you place any orders. Photography often misleads; trust real light.
Small-Space Storage Hacks That Do Not Look Like Hacks
Back-of-door racks, slim rolling trolleys, and clip-on rail accessories solve real problems when used sparingly. Avoid gadgets that complicate cleaning or steal counter space. Fewer, better tools earn their keep. Practical interior design for the kitchen keeps benchtops clear: a wall-mounted rail with hooks holds ladles and sieves so drawers close easily.
Safety, Compliance, and Quiet Comfort
Electrical safety, gas clearances, anti-tip brackets for tall units, and child-safe latches protect your household. Acoustics matter in open-plan flats: soft-close hardware and felt pads reduce clatter. For interior design for the kitchen in older apartments, ask a licensed electrician to assess the loading before you add power-hungry appliances. Keep fire blankets and extinguishers accessible and labelled.
Budgeting and Phasing That Keep Momentum
Break the project into stages: services, shells, surfaces, and finishing. Spend first on daily touchpoints and durable surfaces, then add decorative items later. Kitchen interior design on a budget holds a contingency for surprises behind tiles and plaster. Use a simple spreadsheet to track quotes, delivery dates, and warranties. Mark payment milestones so commitments remain clear.
Sourcing: Where to Save and Where to Spend

Spend on hinges, sliders, and tapware; save on decorative handles and open shelves. Kitchen interior design stretches further when you choose standard cabinet widths and off-the-shelf appliance sizes. Buy finishes from vendors who issue maintenance guides so future touch-ups match. Ask retailers to note batch codes on your invoice.
Sustainability Without Sacrificing Practicality
Durable finishes that last are the first form of sustainability. Low-VOC paints, FSC-certified timber, and energy-efficient appliances reduce ongoing impact. Waste planning matters: design a clear zone for recycling and compost so habits stick. Approach interior design for the kitchen with timeless finishes to avoid rapid replacement. Choose LEDs for long life and low heat.
Working With Designers, Contractors, and Retailers
Clear briefs produce better work. Share your measured plan and mission statement at the first meeting. Kitchen interior design conversations move faster when everyone sees the same drawings and samples. Request written scopes, timelines, and site protection plans so the build phase runs smoothly. Photograph services before they are covered.
Quality Checks Before Final Payment
Inspect door alignment, caulk lines, and the way drawers glide. Run appliances on a test cycle and check for leaks under the sink. A room only feels finished when the small details work under daily use. Keep a short defects list and hold a retention sum until items are resolved. For interior design for the kitchen, document serial numbers and settings for future service calls.
READ MORE: Top 20 Kitchen Interior Decoration Mistakes You Should Avoid
Styling That Supports Daily Life
Tea towels, chopping boards, and canisters provide colour without permanent commitment. Plants soften hard lines and improve air quality. Kitchen interior design thrives on restraint: leave some surfaces empty for visual rest. Choose washable rugs and wipeable seat pads so maintenance remains simple. Rotate displays seasonally for a fresh feel.
Future-Proofing With Flexible Choices
Choose modular units you can add to later, and leave spare power points for new devices. Hardware lines that stay in production for years make replacements simple. Suppose you future-proof your kitchen interior design, upgrade slots without upheaval. Plan spare tiles and paint for small repairs.
Bundles, Packages, and Showroom Negotiation
Retailers often offer bundle discounts on appliances or hardware. Compare the package price against the sum of individual items and check whether models are current, not outgoing stock. Ask for delivery consolidation and installation credits. For kitchen interior design, bundle hinges and runners from the same line to keep spares simple. Negotiate on lead times during off-peak periods for better scheduling and attention from the installation team.
Online Research, In-Store Testing

Read specifications online, then verify in person. Pull drawers, slam doors, and run a wet cloth across door samples. Check how a sample reflects under warm and cool light. Sit on stools for a few minutes to test comfort. Bring a magnet to confirm the stainless steel grade on display units. Responsible shopping blends research with a reality check in the showroom.
Delivery, Access, and Site Readiness
Measure lift cars, stair turns, and doorway widths so that large items actually reach the room. Protect floors and corners before installers arrive. Stage deliveries in the order needed: carcasses first, then appliances, then worktops. If the building has quiet hours, match your schedule to those windows. Confirm power and water availability on the day so testing is not delayed. Keep packaging until you confirm items are defect-free.
Warranties, Service, and Spare Parts
Register appliances immediately and keep digital copies of invoices, serial numbers, and settings. Ask suppliers how long spare parts remain available for the chosen models. Create a small folder that logs service visits and filter changes. Good records reduce downtime and help future owners.
READ MORE: What To Know About Your Appliance Warranty
Budget Templates and Cost-Saving Tactics
Allocate percentages to the big buckets: cabinets, counters, appliances, flooring, lighting, and labour. Use a 10% contingency for surprises. Save by selecting standard colours and sizes, reusing sound carcasses with new doors, and choosing ex-display appliances with full warranties. Spend where you touch and move daily; economise where replacement is easy.
A Final Pre-Order Checklist
Confirm dimensions, finishes, hardware, appliance models, delivery dates, and installation sequence on one signed sheet. List responsibilities for disposal, protection, and post-install clean-up. Include a snagging schedule and who signs it off. A simple checklist turns a complex purchase into a steady sequence that the whole team can follow.
Case Study: Two Shopping Paths
Consider two homeowners with similar rooms but different constraints. The first keeps most of the existing carcasses and replaces only door fronts, worktops, sink, tapware, and lighting. They spend the time to test hardware in-store and negotiate a bundle for hinges, runners, and handles. The result looks fresh, reads cohesive, and protects the budget for future upgrades.
The second starts from scratch without a plan, orders a mix of cabinet widths, and discovers late that the fridge door hits a wall. Repairs, returns, and reorders follow, and the timeline stretches. The lesson is simple: decide the scope early, verify every constraint, and stick to a clear sequence.
For visual continuity, keep the same plinth height across all runs, align sightlines from the living area, and repeat one timber tone rather than three. When buying appliances, confirm service access and ventilation allowances before you finalise cabinet dimensions. If your space is open to guests, place the least tidy tasks near a wall and the neatest surfaces on show.
Set a small styling budget at the end for textiles and plants so the room feels finished without resorting to heavy ornament. In many homes, the smartest move is to phase the work: first stabilise services, then install reliable shells, and only later add accent finishes.
This approach frees you to focus on the daily value of cooking, conversation, and calm rather than chasing trend cycles that change too quickly. If you keep that focus, the design lasts longer and maintenance stays simple. Finally, remember that kitchen interior design improves when you measure, mock up, and test the human experience before the purchase, not after delivery.
A Six-Week Shopping Timeline
Use this six-week timeline to turn a complex kitchen project into clear weekly steps. It helps you coordinate orders and deliveries, protect warranties, and avoid last-minute changes. Check off each week before you move on to keep momentum and reduce costly mistakes.
Week 1: Confirm measurements, electrical and plumbing status, and any permits that affect delivery or installation.
Week 2: Lock the layout, cabinet line-up, and appliance models. Place orders with lead times in mind and schedule deliveries in the correct sequence.
Week 3: Prepare the site by protecting floors and door frames. Set up temporary cooking arrangements and a clean storage area for incoming goods.
Week 4: Accept carcasses and appliances. Verify items against the packing list and photograph serial numbers before installation.
Week 5: Fit worktops and connect services with licensed trades. Test every function and record settings for future reference.
Week 6: Complete sealing, splashbacks, and lighting. Run a full clean, review your snag list, and set dates for fixes.
Throughout: Keep copies of invoices, manuals, and care guides in a shared folder so anyone at home can find them quickly. A prepared schedule keeps the project moving and leaves you free to make thoughtful styling choices once the essentials work smoothly.
Post-Install Care and Maintenance Schedule
Set a simple calendar so your new room keeps performing. In the first week, tighten hinge screws, check silicone lines, and run every appliance through a full cycle while you still have installers on call. Each month, clean filter meshes, wipe door seals, and vacuum fridge coils; log any odd noises or leaks. Each quarter, re-oil timber tops if applicable, test RCDs, and review task lighting for flicker. Once a year, pull out base units to inspect plumbing and power, refresh grout sealers, and photograph serial numbers and settings for your records. Treat kitchen interior design as a system you tune regularly, not a one-off project, and small checks will prevent costly fixes later.
Conclusion
Smart shopping replaces guesswork with a clear, calm plan. When you treat kitchen interior design as a set of connected decisions, every purchase supports the next. By measuring carefully, mapping workflow, and choosing durable finishes, you build a space that works day after day. Use these principles of kitchen interior design to protect your budget while creating a room that welcomes cooking, conversation, and quiet moments alike. Label cables, hinges, and filters for easier maintenance.
Visit Living Comforts to download a room-by-room shopping checklist, compare sample budgets, and view finish-and-hardware bundles tailored to small kitchens.